Tuesday, 24 April 2012

Day 87 Tuesday 24th April 2012 Fashion Constructed Image Set-build day 2

Tuesday 24th April 2012 Fashion Constructed Image  Set-build day 2

A number of tasks have been completed today, those include a hands and knees operation to remove sharp staples (applied by previous user) from the carpet, these were seen as a threat to the trail of the dress. By end of play we have positioned one extra small light and provisioned for a second. Our male model has popped in and we has asked if he could kindly pop in with the jackets to test them with the lighting and against the colour palette of the room. The desk has has some blocks cut to raise it slightly and further blocks have been made should we need to raise it further. Ian has been working on the lighting setup, and we have some further ideas to create the effects we desire. We are attempting to keep the work area clean and tidy as we go along as we continue to be on-time and on-plan.

(All images care of Jenna Williams)

Starting to make the 'outside' area more controlled with regards light spill and reflections on the perspex

Adjusting the picture position

Our lighting lead working on the overhead lighting system. With regards H&S we ensured a safety cable was applied to the lights on the rig and all cables were tidied and carefully routed.

Reduced modifier, corridor lights and effects room lights all on

Testing how the lights fall on the material of the dress. We have also worked hard to create 'accurate' reflections in the mirrors of the sideboard. This has included manufacturing a short section of fake wall opposite the door and around the corner from the telephone.

Monday, 23 April 2012

Day 86 Monday 23rd April Fashion Constructed Image Set-build Construction day

Fashion Constructed Image Set-build Construction day 1.

Starting the day by bringing both Murray (set build assistant) and Jenna (guest build photographer) to uni. We checked out the carpet and props that had been delivered (care of Sacha) on Friday night. We soon set about positioning the carpet, finding the best flats and making the supports and slowly progressing through the task of building the whole set. The whole team was in early, starting with a pile of furniture, props and tools we worked as a team to produce the set. A work-space area was created for tools and equipment. We taped the outer edges of the carpet to reduce trip hazards, marked the floor to indicate safe area just inside the door of studio 1 for visitors.
The set itself  is constructed with three flats on the right and one at the end to hang the door on, and two flats on the left. We'd constructed the window frame during the pre-lighting workshop, and set up the camera as soon as we were able to thus ensuring our image matched our expected output.After speaking to JS we decided to erect the goalpost support system for the 'space-light' just to see how the lighting might work. Obviously (from the pictures) the lite modifier is to long/low, but this will be adjust as we progress the project.We made supports where required and also braced the rear of the flats where needed. The tongue and grove lower wood panelling was applied with panel pins (and touched up with a dark oak finish on the top edge), and topped with a skirting board and dado rail, also affixed with 20mm panel pins. The rear of each pin was bent over and taped for safety. . A lot of care and attention was placed in trying to get a decent join between the panels before decor, with filler applied in the gaps the paper was then applied as soon as possible. A small flat was constructed to go over the door and architrave used to complete the effect prior to papering. Door handles and the hotel door room-numbers where affixed and furniture and props started to be placed where possible.. . 

(images care of Jenna Williams UCA Maidstone)
Ignore the low slung 'space light' fitted on the 'goalposts' light support system. This is to be adjusted and the lights are not due to be fully placed/tested and completed until wed (in the schedule)

Miniature flat I constructed fixed over the door, and architrave being fitted to door surround 

Bed cover in place, and completed door surround, picture hung also

Creating the window surround

Once the surround is built it is dressed with brick wallpaper


Saturday, 21 April 2012

Free Day Saturday 21st April 2012

Saturday 21st April 2012.  Today I started to put together the tool box's for next weeks setbuild-Fashion Constructed Image project. I've also found some plans to go with our secret documents and got the telephone back out that I initially offered to the team. JS felt the trim phone we'd selected was too 1970's. Murray who will be assisting us on the first day of the build works for BT and has confirmed this type of phone would have been used well into the 1960s.


I'm also assisting group seven by supplying them some foliage for their project that starts the week after our shoot.


Friday, 20 April 2012

Day 85 Friday 20th April 2012 Hand-in Time Machine

Friday 20th April 2012 Hand-in Time Machine. Today was hand in for the time machine essay and corresponding presentation.. Also the pin hole image for the commission project was also handed in.

I brought in the adjusted window sill (trimmed last night at home to fit) for the Fashion Constructed image set,  also returned my library books. After this I met up with a student friend from UCA Maidstone and took her to a friends house to assist with shooting some medium format images for her graphic design second year project.

Day 84 Thursday 19th April 2012 Fashion Constructed Image set-build sighting test and Call sheet

Fashion Constructed Image set-build sighting test (and call sheet)
'Ballast' controls (note settings)

Rear fixing for the Kino tube lighting system http://kinoflo.com/

Brackets and power cables neatly stored for the Kino system

'Jumper' LH side and dimmer control for the smaller Dedo lighting system  http://www.dedolight.com/www/dedolight/default.php?la=0

Example of a Dedo light

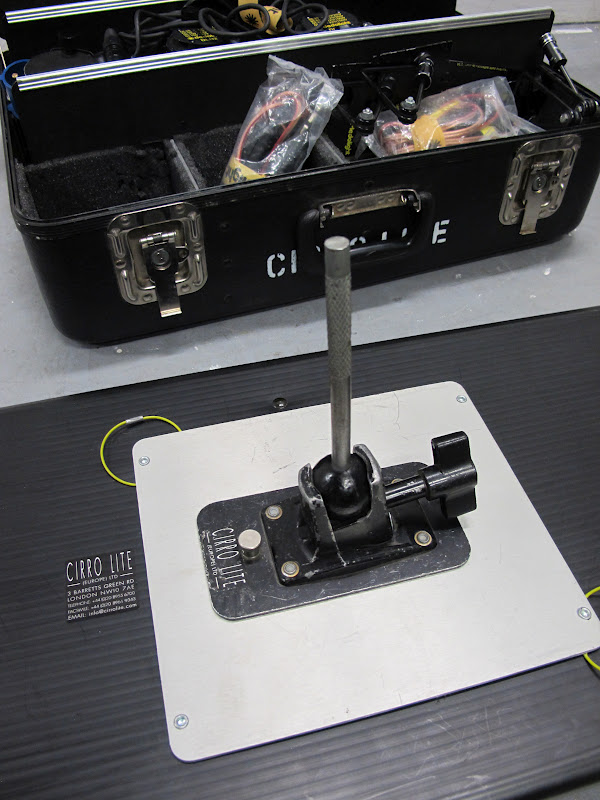
'Spacelight' note the six individual lights, controlled in  threes by two separate controllers complete with dimmers

Goal post set up, note the 'spacelight' on the floor

Trying the 'spacelight' for the first time

Basic layout. Today i intend to construct the window frame whilst Ian works on his lighting plan further with the 'new' lights available to test

Previous set test shot, and new image. More time has been spend on set issues due to the change in studios from Studio two (initial test) to studio one (final shoot location)

Completed window frame that I constructed. Testing the overhead 'spacelight' now available and used to replace the boom set-up UCA has. We will need a long pole for the goal post and the test has helped with details such as this. 


Call Sheet completed for shoot:


CALL SHEET
SHOOTING DAY NO, 1.  CALL TIME, 08:30. DAY/DATE, 26th April 2012_____ PROJECT, Fashion Constructed Image. Group, 1.
Shoot location:
UCA Rochester
Fort Pitt
Rochester
Kent
ME1 1DZ
Tel: +44 (0)1634 888702

By road
Take the M2 from either London or East Kent direction, then exit the M2 at junction 3 (A229). Follow the signs to Chatham/Rochester. After the Toys 'R' Us roundabout, stay in the left hand lane and continue onto City Way.
After about 2 miles, at the bottom of the hill, turn right at the mini roundabout into New Road Avenue, then after 1/4 mile turn right into Fort Pitt Hill. The entrance to the University is at the top at the hill.

By rail
Take a National Rail train from London Victoria to either Rochester or Chatham stations, then walk for five minutes to the University at the top of Fort Pitt Hill.
Eurostar passengers should get off the train at London St. Pancras International before taking the Underground (Victoria Line – Northbound) to Victoria.

Group1  Members
Time required
 Role
Loc
Martin Wilby
08:30
Team 1
Studio 1
Amie Overbury
08:30
Team 1
Studio 1
Sacha Stevenson
08:30
Team 1
Studio 1
Lucie Nakach
08:30
Team 1
Studio 1
Ian Wisbey
08:30
Team 1
Studio 1
Jenna Williams
-
External photographer
Studio 1
Tom Williams

Fashion/hair/make-up
Studio 1
Suzy

Fashion/hair/make-up
Studio 1
Maria

Fashion/hair/make-up
Studio 1


Cast

CAST #
CHARACTER
 MODEL
 MAKEUP
SET
REMARKS
1
Male spy
Ollie Gapper
Tom Williams, Suzy, Maria
Foreground
Props Camera/pistol (P38)
2
Female spy
Estephanie
Tom Williams, Suzy, Maria
Centre
Pistol (Lugar)


Contact details

Cast/Crew
 Contact details
 REPORT TO:


Martin Wilby
0792125xxxx
-


Amie Overbury
0779492xxxx
-


Sacha Stevenson
0793436xxxx
-


Lucie Nakach
0794055xxxx
-


Ian Wisbey
0772244xxxx
-


Jenna Williams
0771242xxxx
Team 1 Studio 1 (Existing UCA student, with access to building)


Tom Williams
Via Lucie
Team 1 Studio 1 Existing UCA student, with access to building)


Suzy
Via Lucie
Team 1 Studio 1
Existing UCA student, with access to building)


Maria
Via Lucie
Team 1 Studio 1
Existing UCA student, with access to building)


Ollie Gapper
Via Lucie
Team 1
Existing UCA student, with access to building)


Estephanie Standen
Via Lucie
Team 1
Existing UCA student, with access to building)


Parking

We are unable to offer parking on campus at Rochester and with limited street parking surrounding the campus visitors are encouraged to use public transport where possible. Exceptions can be made for Blue Badge Holders, and anyone with special requirements should contact UCA Rochester directly. Further information on the location of parking is provided by Medway Council.

Wednesday, 18 April 2012

Day 83 Wednesday 18th April 2012 The Commission

Today was split into two sessions, the first of which was a 'zine' workshop with Bruno Ceschel starting at 09:30. We started off the session by welcoming a new member to group E in the shape of Rebecca Smith. The group was split for the purpose of making the 'zines' and i worked with Dana, Sacha, and Rebecca. Using Abobe Bridge to open and edit (grade) the images we ended up with a pretty much equal selection and then set about learning the basics of 'In-Design'. Bruno showed us the basics and we set about adding the images to a simple template, thankfully Sacha had previous experience with 'In-Design' and that helped us greatly. Once created it was converted to a PDF and then each groups work was viewed and discussed.
Following on from this session we (Myself Sacha and Amie) briefly sat down with JS to confirm we are unable to alter the shoot date for the fashion image, a question JS had put to the team in response to space constraints within the building.

Myself and some of the rest of group E were able to meet up in the canteen to discuss the forthcoming tutorial that was due at 14:00


Later at 14:00 'group E' had it's first official tutorial for the second half of the Commission project with SK in room 712. The newly published tasks were discussed and a few hints and tips were offered, thankfully a number of the team had already briefly met up and started to discuss most of the areas that were discussed during the meeting. The tasks themselves look fairly strait forward, but like everything in life it's only easy if you work hard to make it easy! I'm looking forward to getting started on this second half of the project but the Fashion Constructed Image project set-build starts for me on Monday, so it will be a somewhat difficult start to the work.


Monday, 16 April 2012

Day 82 Monday 16th April 2012 The Commission

Monday 16th April 2012 The Commission:

Returning after the Easter break we started we a reminder of some of the elements of the brief in relation to the formation of the teams. This was in LT1 with SK and JS and also the teams were changed from a numeric identification to an an alphabetic system to reduce confusion between projects.
Our Guest Lecturer for the day (Brno Ceschel) was introduced to us and proceeded to explain his self publish be happy website (http://selfpublishbehappy.com/) and some background and context on self publishing, this occurred in rm 806. We were advided to note some of the names mentioned as visit the site to review some of the books on what is in effect an online library of self published Artists books.

Following on from this I spoke briefly with a couple of members of group E and since we didn't all met up and get to talk, I have created a facebook group for the team, and invited them all to the group.

Following on from this the Fashion group (1) ran through any outstanding issues, I explained I'd ordered the brick effect wallpaper. Sacha bought in the lights which we got tested and I collected those once that was done. Amie Sacha and myself went to a D.I.Y. store and I purchased more wood and Sacha purchased the room number we needed for the 'hotel' door. I did intend to assist with some wood staining, but was called away to assist a friend at uni, who in return assisted me with using the uni scanners to scan some negs (that once cleaned up in photo shop) might hopefully make it up onto the wall!